Live Data is used to display data feeds (such as Live Whale Calendar, or IU News) and is among our recommended content types. It can convert the raw text or code from a feed to be nicely formatted and styled to your liking. Using the Live Data content type is however a little more challenging to learn and implement and this is why we cover its use in detail in the advanced documentation section. Users already familiar with JSON, XML or RSS feeds will benefit in implementing Live Data content. This article only covers the basic step by step creation of the asset.
The Live Data content type allows you to specify a page duration, enabling you to set the length of time that each page of the PDF is displayed before moving on to the next.
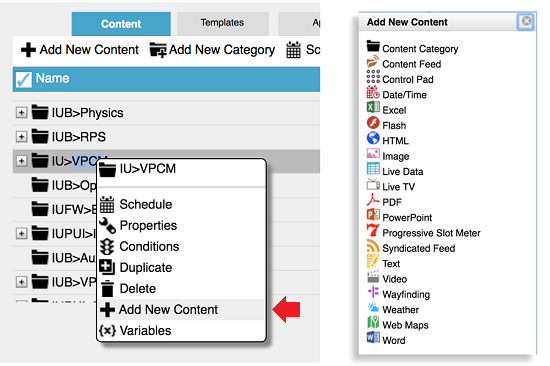
- In Content Manager Web, select your unit's content repository folder so that it is now highlighted. Click the + Add New Content button (above the name column) or right-click and in the pop-up menu select the + Add New Content option.*

- Select Live Data.
- The properties pop-up dialogue opens. Choose your
- On the 'Location' row, click the first button which looks like a folder with 3 dots.
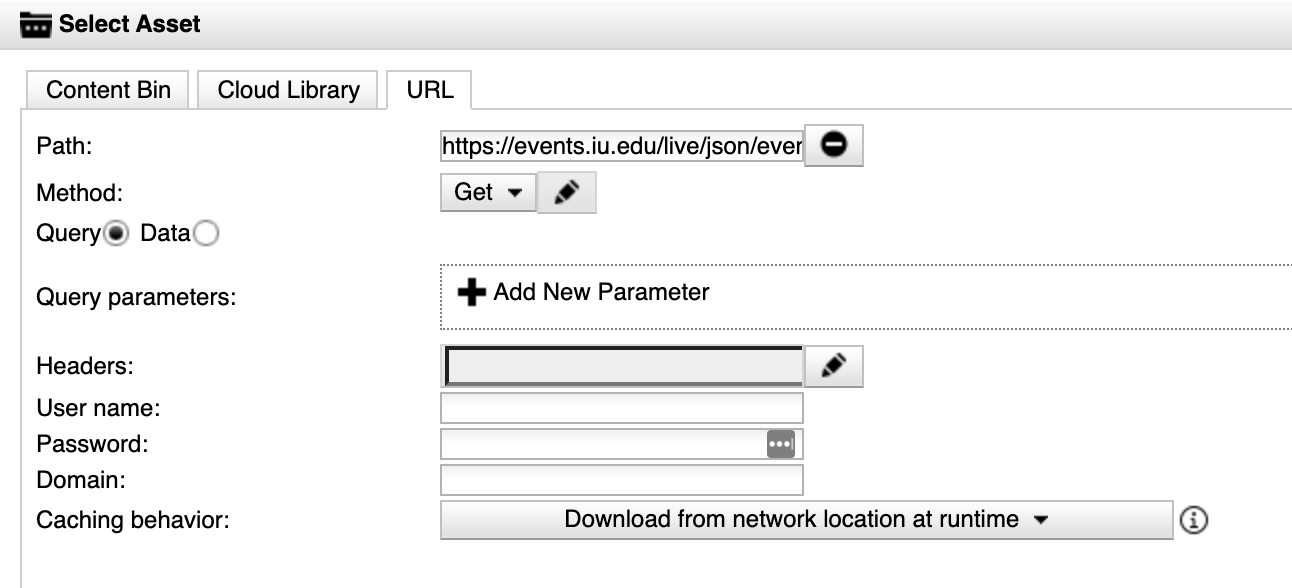
- In the Select Asset menu click on the 'URL' tab. Enter the URL to your data feed. Click OK.

- Choose a duration for your content. For Live Data content you should set a duration or the content will play indefinitely without switching to the next content asset. When the page duration is not set the main duration functions as a page duration. This configuration accounts for any number of pages in the data and allows the content item to cycle with other content items that may reside in the same region. We recommend simply setting the main duration field and to not set a page duration.
(Learn about recommended durations in the best practices for content section.) - Click OK.
- Click the floppy disc icon in the upper left to save your work.
*Note: To avoid permissions errors, select your unit's folder before attempting to create new content or sub folders ("categories").


