Images are a very good and flexible option to display content on your digital signs, but we recommend using them in conjunction with auto publishing cloud playlists. Deploying individual images through Content Manager Web is cumbersome and is not recommended.
In our best practices we recommend using a full screen approach. Images should also follow that recommendation. A typical digital signage display is set to 1920x0180 pixel dimensions, which is an aspect ration of 16 units width by 9 units height. Images should also be sized to the same dimensions. Alternatively, if your images match a 16:9 aspect ratio they will scale and display without distortion.
Make sure any text in your designs is legible and easily read with 15 seconds. All digital signage content should follow accessibility guidelines.
- Upload a JPG or PNG file to your cloud library.
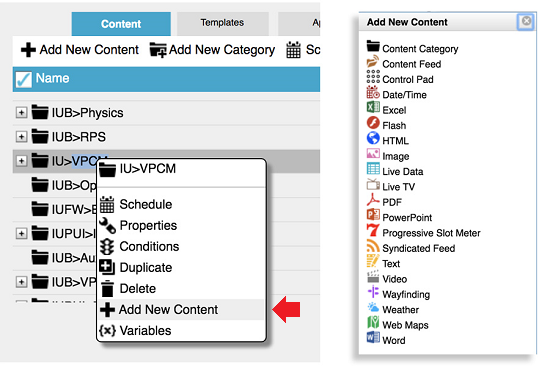
- In Content Manager Web, select your unit's content repository folder so that it is now highlighted. Click the + button (above the name column) or right-click and in the pop-up menu select the + .*

- In the Add New Content pop-up menu select Image.
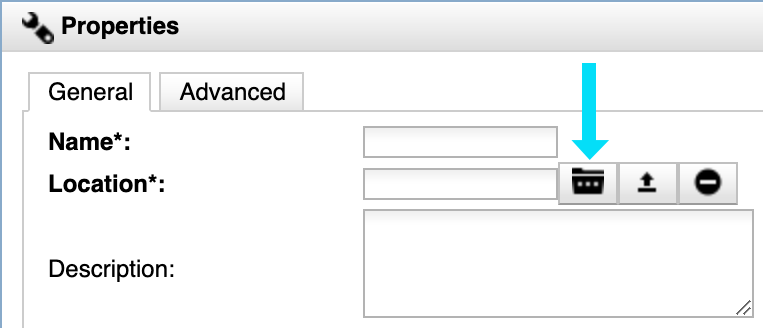
- The properties pop-up dialogue opens. On the 'Location' row, click on the folder icon with an ellipsis.

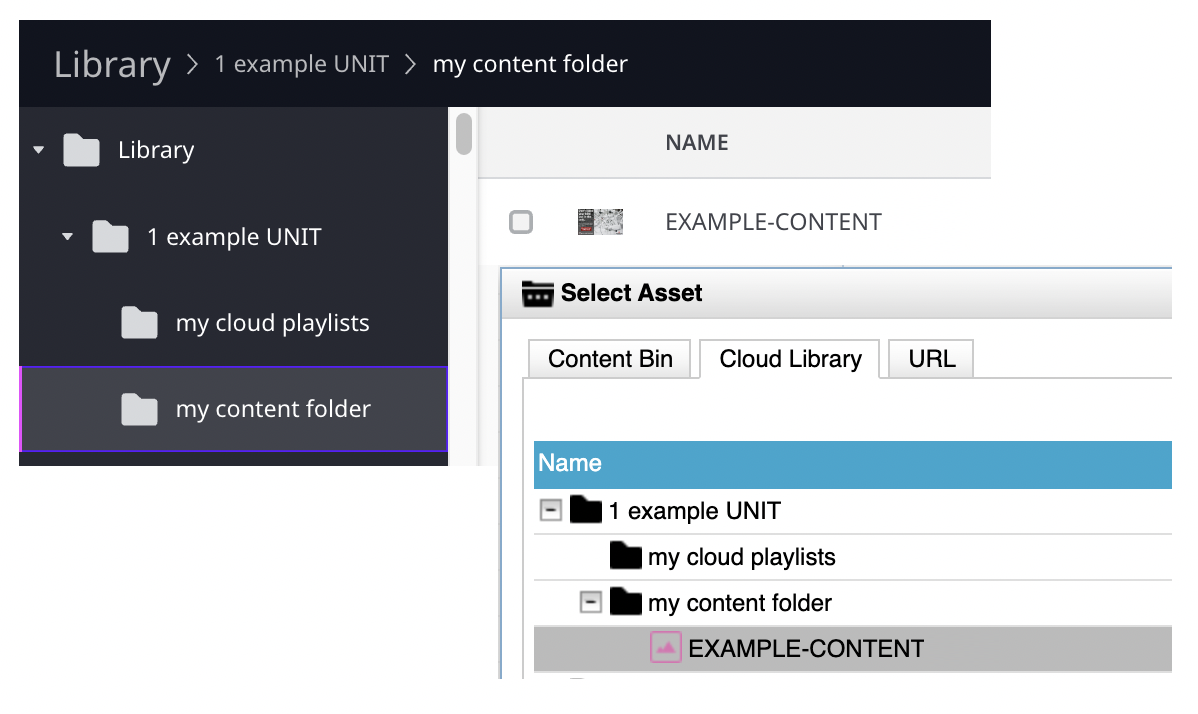
- Click on the 'Cloud library' tab and navigate to the image file you uploaded to your library and select it. Click OK.

The name of your file will populate the name field in the properties dialogue. - Choose a duration for your content. (Learn about our recommended durations in our best practices for content section.)
- Click OK.
- Click the floppy disc icon in the upper left to save your work.
*Note: To avoid permissions errors, select your unit's folder before attempting to create new content or sub folders ("categories").
Drag the new content item to the main content region of the template for any sign(s) and then click on the Save and Deploy button in the upper left of the screen, which looks like a rocket ship.

