A pre-made full screen template is added to your unit's template repository when you are first onboarded to the system. Or best practices recommend using a full screen approach. Using the pre-made full screen template is a fast and convenient way to get started.
Creating a template
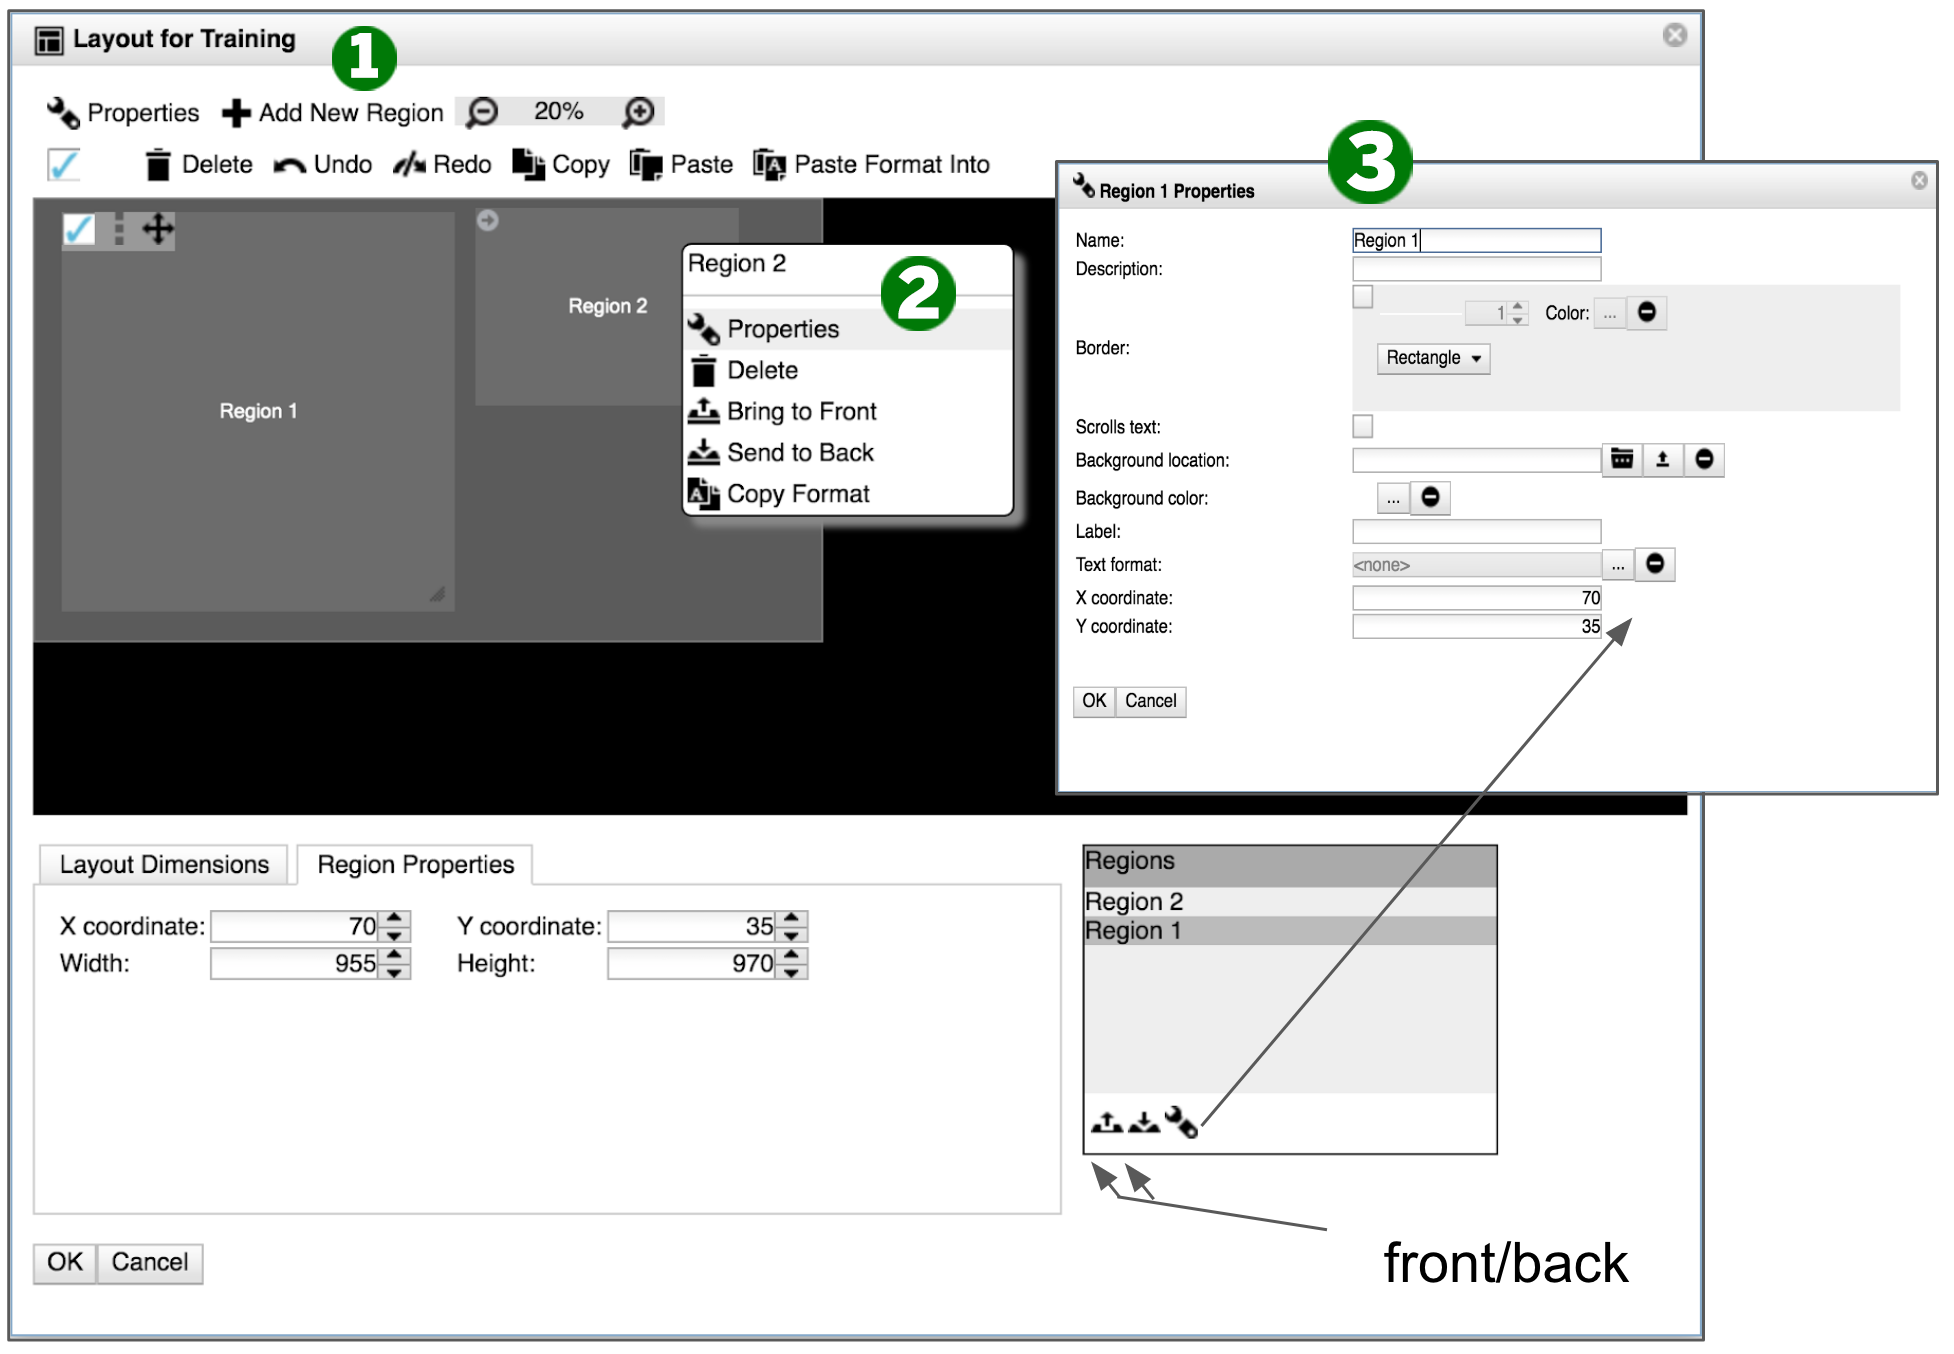
In Content Manager Web, to add a region and set its properties:
- In the layout editor, click .
- In your new region, right-click and select from the context menu.
- In the "Region Properties" window:
- Give the region a descriptive name.
Note:It's helpful to give a region a name that describes the type of content it will display (for example, "Main Slides").
- Check to add a border to the region. You can change the border color and thickness.
- To change the shape of a region, select the shape from the drop-down menu.
- To apply an image as a background to the region, next to "Background location", click the folder icon.
- If you want your region to have a background color, click the ellipsis () to open the color picker dialogue. The default color setting for any region is "transparent" or zero opacity.
- Enter the X and Y coordinates for pixel-perfect positioning of the region.
- Give the region a descriptive name.
- To move your region, click the region itself and drag it to the desired location.
- To resize the region, click and drag the small triangle handle on the bottom right corner.
Note:You can also modify the template or region width, height, and positioning via the tabbed sections below the layout editor.
- Click and save.


